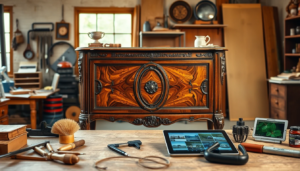
Restoring antique wooden furniture is a rewarding process that breathes new life into timeless pieces. Whether you’re preserving a family heirloom or enhancing a flea market find, this guide will walk you through the steps to restore your furniture with care and precision.
Antique furniture requires special attention due to its age and delicate nature. By following these steps, you can maintain its charm while ensuring durability for years to come.
Understanding the Basics
Before diving into restoration, it’s important to understand a few key concepts:
- Antique Definition: A piece is considered antique if it is over 100 years old. Identifying its era can help determine the materials and techniques used.
- Patina Preservation: The natural wear and aging on furniture add character. Avoid over-restoring, as it can diminish the piece’s value.
- Assessing Damage: Check for scratches, stains, or structural issues like loose joints or cracks.
Knowing these basics will help you approach the restoration with respect for the piece’s history.
Step-by-Step Process
1. Gather Your Tools and Materials
Here’s what you’ll need:
- Soft cloths and brushes
- Sandpaper (various grits)
- Wood cleaner or mild soap
- Wood glue and clamps
- Furniture wax or oil
- Stain and finish (optional)
2. Clean the Furniture
Start with a gentle cleaning to remove dirt and grime:
- Wipe the piece with a soft, damp cloth.
- Use a mild soap solution for tougher stains.
- Avoid soaking the wood to prevent damage.
3. Address Structural Repairs
Inspect for loose joints or broken pieces:
- Re-glue joints using wood glue and clamps for stability.
- Replace missing hardware with replicas that match the original design.
4. Remove Old Finish (If Necessary)
If the old finish is damaged:
- Stripping: Use a chemical stripper to remove paint or varnish. Follow safety guidelines.
- Sanding: Lightly sand the surface with fine-grit sandpaper to smooth imperfections.
5. Repair Surface Imperfections
- Fill cracks or gouges with wood filler.
- Let the filler dry, then sand the surface until smooth.
6. Apply Stain or Finish
Enhance the wood’s natural beauty:
- Choose a stain that complements the piece’s original color.
- Apply evenly with a brush or cloth.
- Seal the surface with a protective finish like polyurethane or furniture wax.
7. Polish and Protect
- Buff the furniture with a soft cloth to add a polished look.
- Apply a layer of wax or oil for additional protection.
Common Mistakes to Avoid
- Skipping Cleaning: Restoring without cleaning can trap dirt under the finish.
- Over-Sanding: This can remove the character of the wood.
- Ignoring Safety: Always work in a ventilated area and use gloves and masks.
Tools and Materials Recap
- Wood Cleaner: For initial cleaning.
- Sandpaper: To smooth surfaces.
- Protective Finish: Ensures durability and shine.
Conclusion
Restoring antique wooden furniture is a skill that combines craftsmanship with respect for history. By carefully following these steps, you can preserve the beauty and value of your pieces while adding a personal touch.
Restoration is as much about patience as it is about technique. Take your time, and you’ll be rewarded with a stunning piece that tells its own story.
Have you restored antique furniture before? Share your experience or tips in the comments below. If you’re new to restoration, give these steps a try and let us know how it goes!