Introduction
Shabby chic is more than a design trend—it’s a timeless way to bring charm, warmth, and personality into your home. Its hallmark? A perfectly imperfect distressed look that makes furniture feel nostalgic yet stylish. Whether you’re new to DIY projects or a seasoned enthusiast, this guide will help you master the art of shabby chic furniture restoration.
The Origins of Shabby Chic
Before diving into the process, it’s helpful to understand the roots of shabby chic. Originating in the English countryside, this style celebrates vintage furniture and soft, muted tones. By blending practicality with aesthetics, it became a popular interior design movement in the 1980s, spearheaded by designer Rachel Ashwell.
The essence of shabby chic lies in embracing imperfections. Scratches, chipped paint, and worn edges are features, not flaws, creating a lived-in and comfortable vibe.
Step-by-Step Guide to Achieving the Distressed Look
1. Choose the Right Furniture
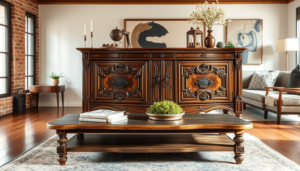
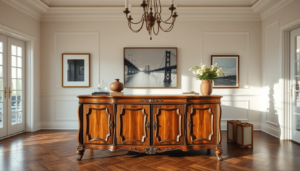
Not all furniture pieces lend themselves to the shabby chic aesthetic. Look for wooden items with intricate details, such as chairs, dressers, or tables. Thrift stores, flea markets, and yard sales are great places to find affordable options.
Pro Tip: Avoid furniture with extensive damage, such as deep cracks or significant structural issues. Surface-level wear is ideal.
2. Prepare the Surface
Proper preparation is key to achieving a flawless distressed look. Follow these steps:
- Clean the Furniture: Remove dust, dirt, and grease using a gentle cleaner and a damp cloth. Let it dry completely.
- Sand the Surface: Lightly sand the furniture to remove any gloss and create a rough surface for the paint to adhere to.
3. Apply the Base Coat
A base coat is essential for achieving depth and contrast in the final look. Use a darker color as the base layer, such as gray or brown, to mimic natural wear.
- Apply one to two coats, letting each layer dry thoroughly.
- Don’t worry about perfection—the shabby chic style thrives on irregularities.
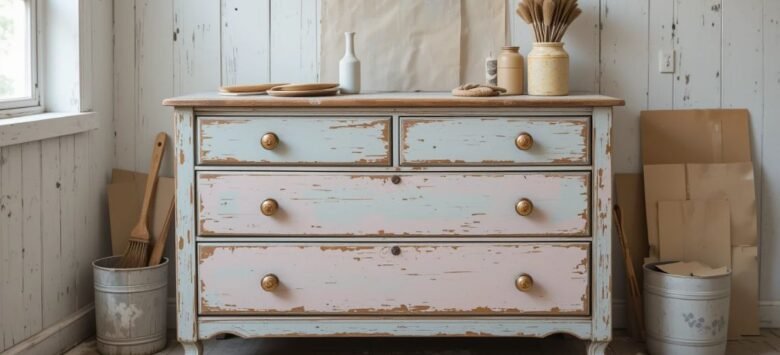
4. Add the Top Coat
Choose a light, pastel shade for the top coat, like white, cream, or pale blue, to achieve the classic shabby chic palette. Use a chalk paint or matte finish for an authentic vintage vibe.
- Apply the top coat unevenly, leaving some areas slightly thinner for a naturally aged look.
5. Distress the Furniture
Here’s where the magic happens! Distress the furniture by strategically sanding specific areas to reveal the base coat. Focus on edges, corners, and spots that would naturally experience wear over time.
- Use fine-grit sandpaper for controlled distressing.
- Gradually build up the distressed effect, stepping back often to assess your work.
6. Seal the Finish
To protect your masterpiece, apply a clear wax or matte polyurethane. This step ensures durability while preserving the rustic charm of your shabby chic piece.
Common Mistakes and How to Avoid Them
- Over-Distressing: Less is often more. Over-sanding can make furniture look unnatural. Step back frequently to check your progress.
- Skipping Prep Work: Cleaning and sanding might seem tedious, but skipping these steps can lead to peeling paint and uneven finishes.
- Using Glossy Paint: Stick to matte or chalk finishes for the authentic shabby chic look.
Styling Your Shabby Chic Furniture
Now that your furniture is complete, it’s time to style it! Pair your distressed pieces with soft textiles, vintage decor, and natural elements like flowers or greenery. Layering textures—such as lace, linen, and wool—can enhance the cozy, romantic feel of shabby chic interiors.
Color Palette Tip: Stick to whites, creams, pastels, and muted earth tones for a cohesive look.
Conclusion
Shabby chic furniture restoration is a rewarding way to breathe new life into old pieces while adding personality to your home. By following these steps, you’ll not only master the distressed look but also create something truly unique. So grab your sandpaper, pick your favorite pastel paint, and let your creativity shine!
Ready to start your shabby chic project? Share your before-and-after photos in the comments or explore our other DIY guides for more inspiration. Don’t forget to subscribe for weekly tips on furniture restoration and interior design!