
Restoring antique furniture is a delicate process that often involves repairing cracks, holes, and other imperfections. Wood fillers are indispensable tools in achieving a seamless finish, preserving both the structural integrity and aesthetic charm of your pieces. This guide explores everything you need to know about wood fillers and how to use them effectively.
What Are Wood Fillers?
Wood fillers are paste-like substances designed to fill gaps, cracks, and holes in wood surfaces. They can be sanded, stained, or painted, making them ideal for furniture restoration projects. The key is to choose the right type of filler for your specific needs.
Types of Wood Fillers
1. Water-Based Fillers
These are easy to use, environmentally friendly, and quick to clean up with water.
Pros:
- Dries quickly.
- Compatible with water-based stains and finishes.
- Minimal odor.
Cons:
- May shrink slightly as it dries.
- Less durable for heavy-use surfaces.
Best For: Small cracks or indoor furniture.
2. Solvent-Based Fillers
Solvent-based fillers are highly durable and ideal for outdoor or heavy-duty applications.
Pros:
- Strong and resistant to wear.
- Bonds well with wood.
Cons:
- Longer drying time.
- Requires solvents for cleanup.
Best For: Structural repairs or outdoor furniture.
3. Epoxy Fillers
Epoxy fillers are two-part compounds that create a hard, durable surface once cured.
Pros:
- Extremely strong and weather-resistant.
- Can rebuild missing wood sections.
Cons:
- More expensive.
- Requires precise mixing.
Best For: Large holes, major repairs, or outdoor furniture.
4. Latex Fillers
Latex fillers are flexible and versatile, often used for smaller repairs.
Pros:
- Easy to apply and sand.
- Compatible with most finishes.
Cons:
- Less durable for heavy use.
Best For: Minor cosmetic fixes on indoor furniture.
How to Use Wood Fillers for Antique Furniture
Step 1: Prepare the Surface
- Clean the area to remove dirt, dust, or loose wood.
- Sand the edges of cracks or holes to ensure a smooth surface for adhesion.
Step 2: Choose the Right Filler
- Match the filler type to your project needs (e.g., water-based for indoor use, epoxy for structural repairs).
- Consider using a color-matched filler to blend seamlessly with the wood.
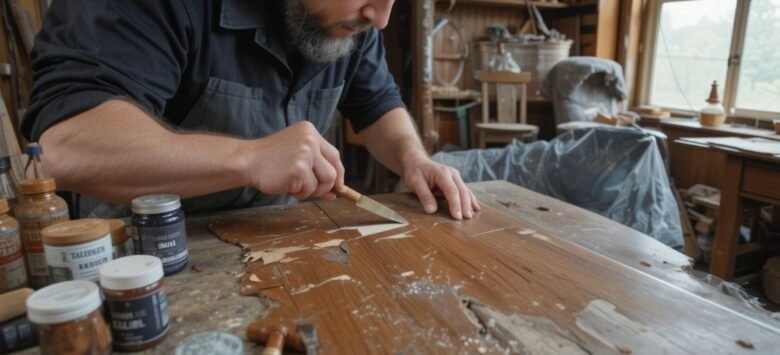
Step 3: Apply the Filler
- Use a putty knife to press the filler firmly into the crack or hole.
- Smooth the surface by removing excess filler with the flat edge of the knife.
Pro Tip: Slightly overfill the area to account for shrinkage during drying.
Step 4: Let It Dry
- Allow the filler to dry completely according to the manufacturer’s instructions. Drying times vary based on filler type and thickness.
Step 5: Sand the Surface
- Use fine-grit sandpaper (220-320) to smooth the filled area until it is flush with the surrounding wood.
- Be gentle to avoid damaging the surrounding antique wood.
Step 6: Stain or Paint
- Apply a matching stain, paint, or finish to blend the repaired area with the rest of the furniture.
Common Mistakes to Avoid
- Using the Wrong Filler: Ensure the filler matches the wood type, project location, and finish requirements.
- Skipping Sanding: Sanding is crucial for achieving a seamless repair.
- Neglecting Proper Curing: Inadequate drying can compromise the repair’s durability.
- Overloading Filler: Applying too much can lead to cracking or uneven drying.
FAQs About Wood Fillers
Can wood fillers be stained or painted?
Yes, but not all fillers absorb stain equally. Use stainable wood fillers for best results.
Are wood fillers waterproof?
Not all fillers are waterproof. Epoxy fillers and some solvent-based fillers are better for moisture-prone areas.
Can I use wood filler on structural repairs?
Epoxy fillers are suitable for structural repairs, but standard wood fillers are best for cosmetic fixes.
Conclusion
Wood fillers are invaluable for restoring the beauty and functionality of antique furniture. By understanding the different types of fillers and their proper applications, you can tackle cracks, holes, and imperfections with confidence. Whether you’re a beginner or an experienced restorer, the right filler can make your antique furniture look as good as new. Have a project in mind? Share your challenges or successes in the comments below!