Furniture refinishing is an art that allows you to transform worn-out pieces into stunning focal points. Whether you want to update an old favorite or revive a thrift-store find, mastering refinishing techniques can save money and create unique, customized furniture for your home.
In this guide, we’ll explore essential tips and tricks to help you achieve professional-quality results while making the process enjoyable and stress-free.
Frequently Asked Questions (FAQs)
1. What is furniture refinishing?
Furniture refinishing involves removing old finishes like paint or varnish and applying a new finish to restore or update the piece.
2. Is refinishing suitable for all furniture types?
While most wood furniture can be refinished, avoid altering antiques with significant historical or monetary value without consulting a professional.
3. Do I need specialized tools?
Basic tools like sandpaper, brushes, and a good finish are sufficient for most projects. For larger or intricate pieces, power tools may be helpful.
4. How long does the refinishing process take?
Depending on the size and condition of the piece, refinishing can take anywhere from a single day to several weeks, especially if multiple layers of finish are required.
Deep Dive: Expert Tips and Tricks
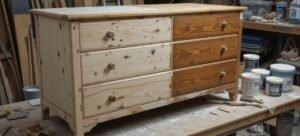
1. Start with Proper Preparation
- Clean Thoroughly: Remove dust, grime, and old polish using a damp cloth and a gentle cleaner.
- Inspect the Surface: Look for damage like scratches, dents, or loose joints. Address these before refinishing.
2. Choose the Right Method
The two main approaches to removing old finishes are:
- Stripping: Use a chemical stripper for heavily painted or varnished furniture. Always work in a ventilated area.
- Sanding: For less complex jobs, sand the surface using coarse-grit paper, followed by finer grits for a smooth finish.
3. Select the Right Stain or Finish
- Oil-based stains are durable and enhance wood grain beautifully.
- Water-based finishes are easier to clean up and environmentally friendly.
- Test the stain on an inconspicuous area to ensure the desired color.
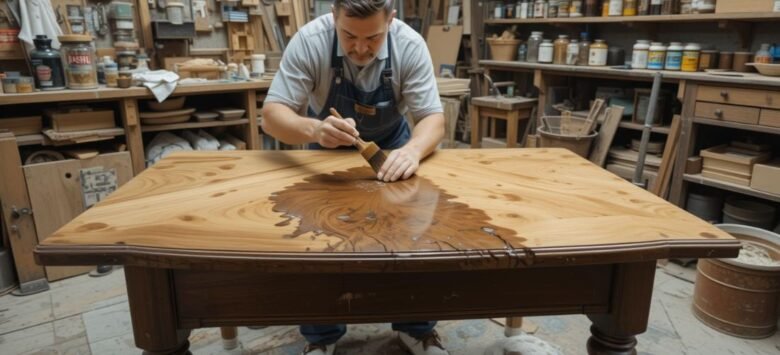
4. Apply Finishes Like a Pro
- Use a foam brush or lint-free cloth for even application.
- Apply thin coats and let each layer dry completely before adding the next.
- Lightly sand between coats with fine-grit sandpaper for a flawless finish.
5. Protect Your Work
Seal the furniture with a protective topcoat like polyurethane, lacquer, or wax. This step prevents scratches and adds durability.
Real-Life Example: A Vintage Coffee Table Transformation
One of the most rewarding refinishing projects is turning an old coffee table into a modern statement piece. Here’s a quick overview of how this transformation was achieved:
- Cleaned the surface to remove years of dust and dirt.
- Stripped off the thick layers of varnish using a chemical stripper.
- Sanded the surface to reveal the natural wood grain.
- Stained the wood with a dark walnut finish for a rich, contemporary look.
- Sealed with a satin polyurethane topcoat for protection.
The result? A stunning, one-of-a-kind coffee table that perfectly fits modern decor.
Quick Tips for Success
- Work in a Well-Ventilated Area: Refinishing involves chemicals that can be harmful if inhaled.
- Patience is Key: Allow adequate drying time between steps to avoid smudges or uneven finishes.
- Invest in Quality Materials: High-quality finishes and tools make a significant difference in the final result.
- Practice on Small Pieces: Before tackling large furniture, refine your technique on smaller items.
Conclusion
Refinishing furniture is more than a practical skill; it’s an opportunity to express creativity and give old pieces a second life. By following these tips and embracing the process, you can achieve professional-level results while enjoying the satisfaction of a hands-on project.
Remember, every refinishing project is a learning experience. With practice, you’ll master the art and create stunning furniture that reflects your personal style.
Ready to start refinishing? Try these tips on your next project and share your results in the comments. Need more inspiration? Explore our blog for additional techniques and ideas!